
Table of Contents
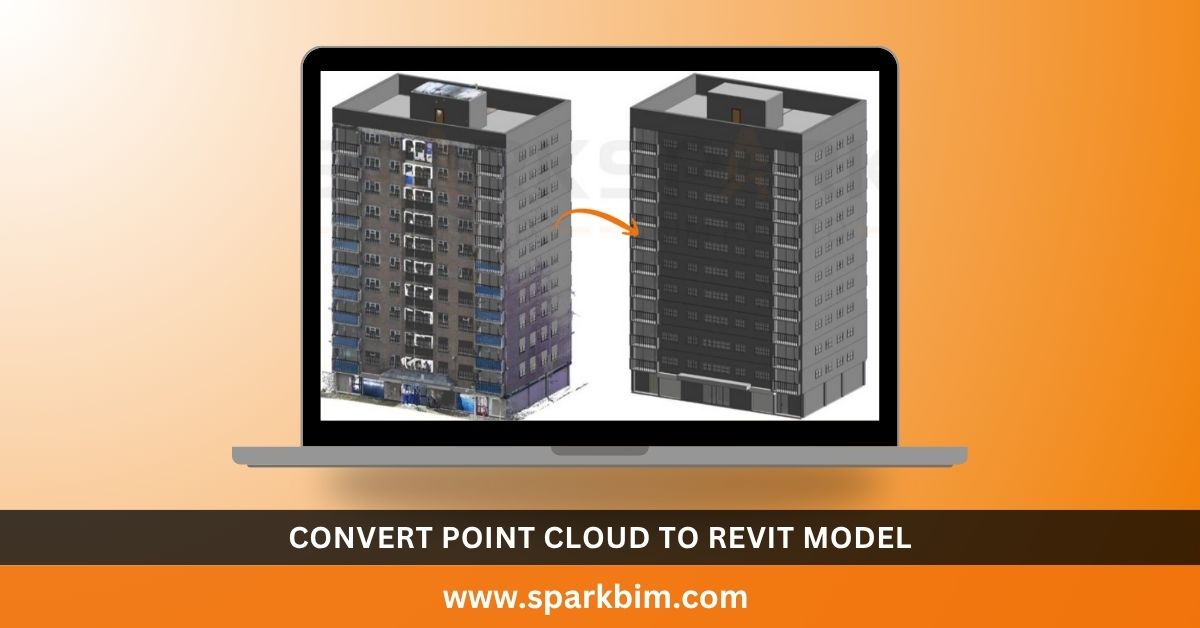
ToggleThe architecture and construction sectors are moving fast, with technology completely reshaping our daily workflows. One of the most effective methods gaining serious traction right now is converting a point cloud to Revit model.
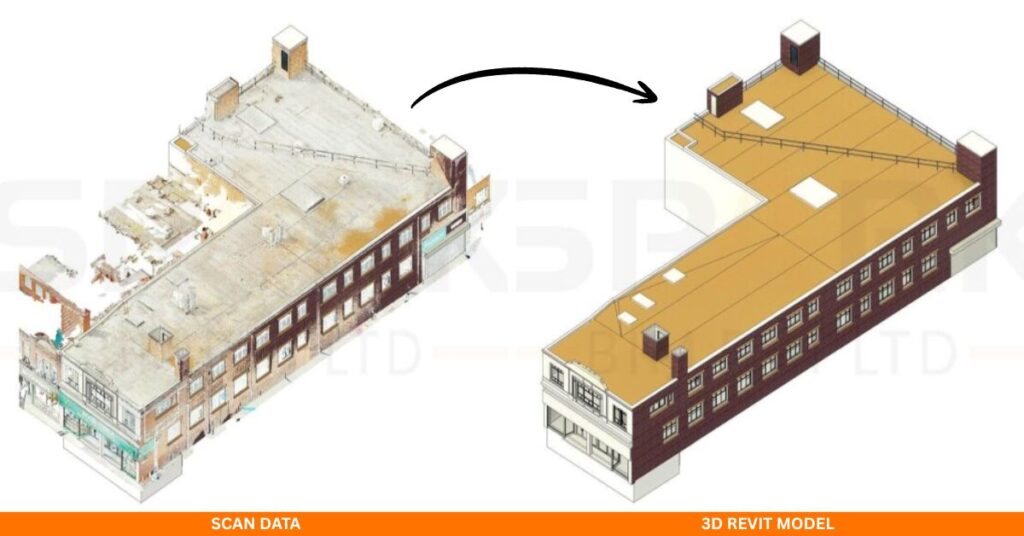
Essentially, this workflow leverages 3D laser scan data to convert point cloud scan to Revit model, turning raw scans into flexible, editable Revit designs. For architects and engineers, these models make visualizing and managing complex structures a lot smoother.
It doesn’t matter if you’re tackling a major renovation, building out a digital twin, or just need solid as-built documentation; this approach delivers high-precision results without the long wait.
If you’re just getting started with BIM or 3D tools, don’t sweat it. This guide on how to Convert Point Cloud to Revit Model keeps things simple. We’ll walk through the steps so you can start modeling with real confidence.
What Is a Point Cloud
Think of a point cloud as a massive collection of millions of tiny dots, all captured from real-world sites using 3D scanners. Each dot has its own X, Y, and Z coordinates—and usually its own color—which combine to create a perfect digital 3D snapshot.
It’s like standing in a room and “photographing” it with laser dots rather than a lens. The scanner picks up every single detail, from walls to the most cramped corners, giving you a total digital twin. You can use these clouds to model anything from old bridges to massive factories in extreme detail.
You’ll usually see these files as .rcp, .rcs, or .e57. They are undeniably bulky and dense, but that’s where the precision comes from. Once processed, they allow you to turn messy real-world data into smart BIM models, the vital starting point for any point cloud-to Revit modeling workflow.
Why Convert Point Cloud to Revit Model
So, why bother to convert point cloud to Revit model? It really comes down to accuracy and sheer efficiency. Old-school tape measurements are slow and honestly a bit unreliable; laser scanning and Revit just cut out the guesswork and save heaps of time.
Architects love this for old buildings where the original plans are long gone. Engineers use the data to spot clashes before a single brick is laid, while contractors rely on it for MEP and retrofitting. Even facility managers use it to keep a digital eye on their assets.
Plus, as smart cities and digital twins become the new standard, these models built from point clouds are quickly becoming a “must-have” rather than a “nice-to-have.”
Revit lets you manage a building’s entire lifecycle through simulation. This doesn’t just sharpen your designs; it stops expensive rework and onsite mistakes in their tracks. That’s exactly why moving point cloud data to Revit has become the gold standard for pros everywhere.
Tools You Will Need
Before starting the modeling process, let’s examine the tools required to convert point cloud into a Revit model. Each plays a vital role in capturing, processing, or modeling.
Hardware
- 3D Laser Scanners – Devices such as the Leica BLK360, Faro Focus, or Trimble X7 scan physical environments and generate dense point clouds.
- Tripod & Targets – To ensure stable scanning and better registration accuracy.
Software
- Autodesk ReCap – Used to import, clean, and register scan data.
- Autodesk Revit – The primary tool for creating intelligent 3D BIM models.
- AutoCAD – Sometimes used for vectorizing 2D elements before bringing them into Revit.
- Navisworks – Helps review the BIM model, detect clashes, and coordinate between teams.
A powerful computer with a good GPU and at least 32 GB of RAM is recommended for handling point clouds, which can be very demanding. Without proper hardware and software, the modeling process can slow down or crash. Always keep your system up to date for a smoother workflow.
Also Read, Scan to BIM Cost: What You Need to Know
Step-by-Step Guide: How to Convert Point Cloud to Revit Model
The process of converting a Revit model from point cloud follows a step-by-step path. It’s a mix of scanning, processing, modeling, and validating.
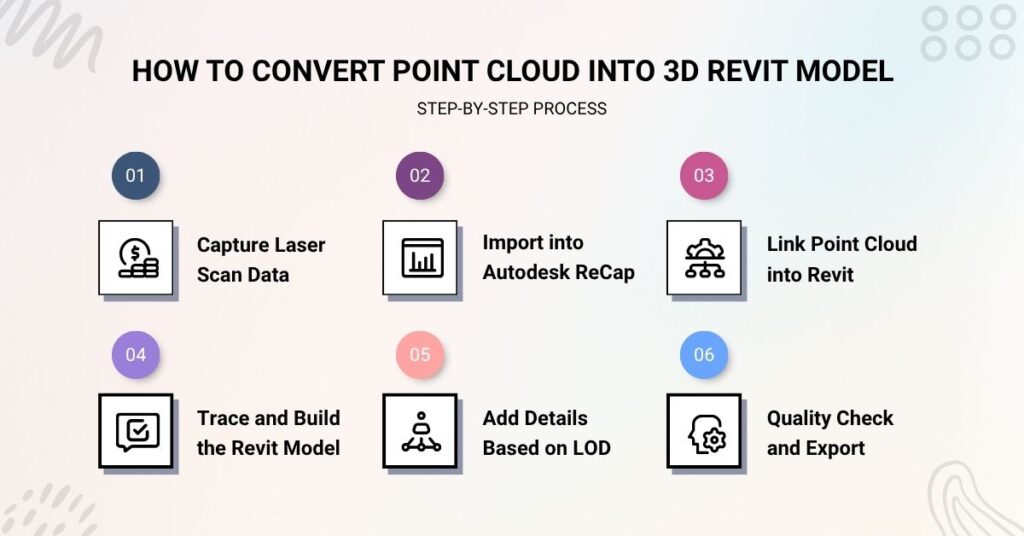
Step-1: Capture Laser Scan Data
It all kicks off with the on-site scan. You take a 3D laser scanner around the building to grab every bit of its geometry from all sides. Most of these kits use LiDAR to nail the measurements with serious precision.
A scan might take a few hours or go the whole day, depending on how big or complex the site is. You’ve got to hit it from multiple angles so you don’t miss any spots. If things get tricky, use targets or markers to make sure every scan line up perfectly.
When you’re done, the scanner spits out raw files. You need to get these onto your PC and run them through something like ReCap to merge them into one. This part is vital if you want a 3D laser scan data to convert point cloud scan to Revit model process that actually works.
Step-2: Import into Autodesk ReCap
Autodesk ReCap is your bridge between scanning and modeling. It helps clean, align, and organize your point cloud data before bringing it into Revit.
Open ReCap and import the raw scan files. The software allows you to:
- Register multiple scans from different positions.
- Remove unwanted data like people, vehicles, or furniture.
- Adjust brightness and contrast for better visibility.
- Export a unified, registered scan file (.rcp or .rcs).
This tidy point cloud is what you’ll use as your Revit guide. If the registration is off, your whole Revit model will be wonky, which causes huge headaches later. Putting in the effort here makes sure the rest of your point cloud-to Revit modeling workflow stays on track.
Step-3: Link Point Cloud into Revit
Once your scan data is ready, open Revit and start a new or existing project.
Go to: Insert → Point Cloud → Link Point Cloud
Select your .rcp file and choose the proper positioning method:
- Auto-Origin to Origin
- Center to Center
- Manual
Make sure the scan is sitting on the right level and facing the right way. Once it’s in, you can see the whole site inside Revit. Spin it around and zoom in to really get a feel for how the building is put together.
Point clouds are typically referenced in 3D views, section views, and floor plans. This allows you to trace over them to begin modeling. Always link the files instead of importing them to keep the project from getting sluggish. This is a must for turning point cloud data to Revit elements with real accuracy.
Step 4: Trace and Build the Revit Model
Now the real work starts, building the 3D BIM model from the point cloud reference. This is where your skill as a modeler really shows.
Start with structural elements like:
- Walls
- Floors
- Ceilings
- Roofs
Then add architectural features:
- Windows
- Doors
- Stairs
- Columns
Use snapping and sections to get your objects lined up tight with the scan. Flipping between 2D and 3D views helps you nail the placement. It’s way easier if you break the whole space down into zones and levels first.
You have to stick to real-world dimensions while you model. That way, the file is actually useful for things like fabrication or renos. This is the core of point cloud to Revit modeling, and it sets the stage for everything else.
Step 5: Add Details Based on LOD
In the BIM world, LOD tells you exactly how much detail you need. Obviously, greater detail takes more time, but it also makes the model a lot more valuable.
Here’s a breakdown:
- LOD 100 – Massing model, basic shapes only
- LOD 200 – Element-based modeling (walls, slabs, roofs)
- LOD 300 – Accurate geometry with materials
- LOD 400 – Fabrication-ready elements
- LOD 500 – As-built conditions
Select your LOD based on your project’s specific needs. For general renovation, LOD 300 is often enough. But for prefabrication or facilities management, go higher.
When you’re doing LOD Revit modeling from scan data, it’s smart to hit the big stuff first—like the structure and HVAC—before worrying about the small bits. It keeps the client happy and saves you heaps of time.
Step 6: Quality Check and Export
Before delivering the final model, perform a thorough quality check:
- Are all walls properly aligned with the scan?
- Are there any missing elements?
- Do the levels match the real-world heights?
- Have you named and organized all model elements?
You should also run clash detection in Revit or Navisworks to make sure pipes and beams aren’t running through each other. This is a big deal for MEP-heavy jobs.
Once you’re happy with it, export to RVT or IFC. Throw in your notes and metadata, and you’re done. You’ve successfully finished the point cloud to Revit modeling and built a solid digital twin of the site.
Benefits of Revit Modeling from Point Cloud Data
Let’s explore the advantages in more depth. Using point cloud data for modeling has become a global best practice.
Highly Accurate Models
Point clouds deliver precision that tape measures simply can’t. These scans pick up every little bend and structural quirk, which is a lifesaver when you’re working on old buildings.
Faster Turnaround Times
Old-school surveys can take weeks. Using laser scans and Revit models from scans slashes that timeline, meaning clients get results faster, and design work can start sooner.
Better Decision-Making
Having real-world data in Revit lets you make much smarter calls. You can test out layouts and estimate materials with total confidence.
Long-Term Use
The model isn’t just a one-and-done thing. It’s useful for years, from maintenance and renovations to energy studies and tracking assets.
This makes point cloud-to 3D model Revit workflows a wise investment for anyone in the AEC industry.
Also Read, Scan to BIM Solutions for Contractors
Real-World Impact Metrics for Scan to BIM Projects
| Metric | Typical Impact in Practice |
|---|---|
| On-site clash reduction | Up to 40 % fewer conflicts detected in BIM |
| Rework cost reduction | 15–20 % lower rework when using point cloud derived BIM |
| Prefabrication time savings | 20–50 % faster construction with BIM prefabrication |
| Digital twin adoption | Over 50 % of AEC leaders implement twins with BIM backbone |
Common Output Formats, When to Use Them
| Format | Best Use Case | Advantages |
|---|---|---|
| .rcp / .rcs | Primary Revit linking format | Optimized for performance and indexing |
| .e57 / .las | Scanner exports, generic | Standard point cloud formats from many devices |
| IFC | Interoperability, exchange | Neutral BIM format for software interop |
| DWG / Vector | 2D extraction | Good for 2D deliverables from scans |
Questions About Converting Point Cloud to Revit Model
Let’s tackle some of the most frequently asked questions people have when starting to convert point cloud modeling in Revit:
How long does it take to create a Revit model from a point cloud?
How long it takes depends on the building size, the required LOD, and the quality of the scan. For instance:
- A small house with basic LOD might take 2–3 days to complete.
- A large office building with high LOD (300–400) might take several weeks.
- If the scan is messy or full of “noise,” cleaning it up will eat into your time. Plus, curvy or complex structures are always going to take longer than a standard boxy building.
Can you convert point cloud to Revit without Autodesk ReCap?
Technically, yes, but not recommended. ReCap is optimized to work with Revit, offering seamless linking and better processing tools. However, other third-party tools, such as CloudCompare, PointCab, or Leica Cyclone, also offer conversion features.
Just remember that ReCap is part of the Autodesk family, which makes long-term model maintenance much easier.
Which file formats work best in Revit for point clouds?
Revit supports:
- .rcp and .rcs (from ReCap)
- .e57 and .las (standard formats)
- The .rcp format is ideal because it’s indexed and optimized for fast loading in Revit. These formats help streamline the point cloud-to-Revit modeling workflow efficiently.
Best Practices for Better Modeling
Use a High-Performance Computer
These files are huge. You’ll want a beefy PC with a fast SSD and at least 32GB of RAM if you want to avoid crashes and slow renders.
Organize Your Files
Get your file structure sorted from day one. Use clear names and dates so you don’t get lost in a mess of different versions.
Use Grids and Levels Early
Setting up your grids and levels early is the secret to an accurate model. Always align everything to those real-world specs.
Work in Section and 3D Views
Flip between 3D and plan views to make sure everything is where it should be. Use tools like Slice and Cutaway to get into the tricky, complex areas.
Check Regularly Against Point Cloud
Keep checking your work against the scan as you go. Catching a misalignment early is way better than trying to fix it at the last minute.
Stick to these tips and your point cloud modeling will be faster, smoother, and much more reliable.
Real-World Use Cases
The whole Convert Point Cloud to 3D Real World Space process isn’t just for architects. Plenty of industries use it:
Architecture and Design
Architects use these models to visualize spaces and prove their concepts work. It’s the fastest way to map out existing conditions for a new proposal.
Construction and Engineering
Engineers rely on point cloud modeling for structural checks and MEP planning. It makes clash detection a breeze when the model actually matches reality.
Facility Management
With a solid model, facility managers can track pipes and wires and plan out maintenance. It basically gives them a smart “digital twin” to work with.
Heritage and Historical Preservation
Scans are perfect for preserving old heritage sites. They let historians and architects document every tiny detail with millimeter precision.
Manufacturing and Industrial Design
Most factories don’t have up-to-date plans. Scans let designers build precise models for new machinery or safety upgrades.
All these examples show just how much value a point cloud-to-3D Revit model can add to different businesses.
Final Thoughts
In the AEC world today, knowing how to convert point cloud to 3D model Revit or turn scan data to Revit model isn’t just a nice skill—it’s vital.
With tighter deadlines and more complex builds, having a reliable model based on real data gives you a massive advantage.
You now understand:
- How to convert point cloud to Revit model
- What tools and software are involved
- Step-by-step instructions
- Real-life examples and industry applications
- Best practices and FAQs
Whether you’re an architect or a BIM professional, mastering this workflow will open up a lot of doors. Keep at it, stay on top of the tools, and enjoy building the future with better data.