
Table of Contents
ToggleIn the fast-paced world of construction, time is money. Every delay on a job site adds extra cost, slows the schedule, and often leads to team frustration. One of the biggest reasons behind these delays is poor coordination between mechanical, electrical, and plumbing systems.
A clear and detailed MEP Coordination Checklist becomes a game-changer. This guide provides a practical, easy-to-use checklist for keeping your MEP systems in perfect sync.
Whether you are a project manager, MEP engineer, or contractor, this blog post gives you the tools to avoid errors, improve collaboration, and, most importantly, prevent site delays.
What is MEP Coordination and Why does it Matter
MEP coordination means aligning the mechanical (like HVAC), electrical (like lighting and wiring), and plumbing systems so they work smoothly together within the same building structure. These systems often share tight spaces like ceilings, shafts, and risers. If one system blocks another or doesn’t fit, you must stop work, fix the issue, and delay the schedule.
That’s why a strong MEP Coordination Checklist is not just useful—it’s essential. It ensures each team understands their role, sees potential clashes early, and works together toward one goal: a well-built, delay-free project.
MEP Coordination Checklist
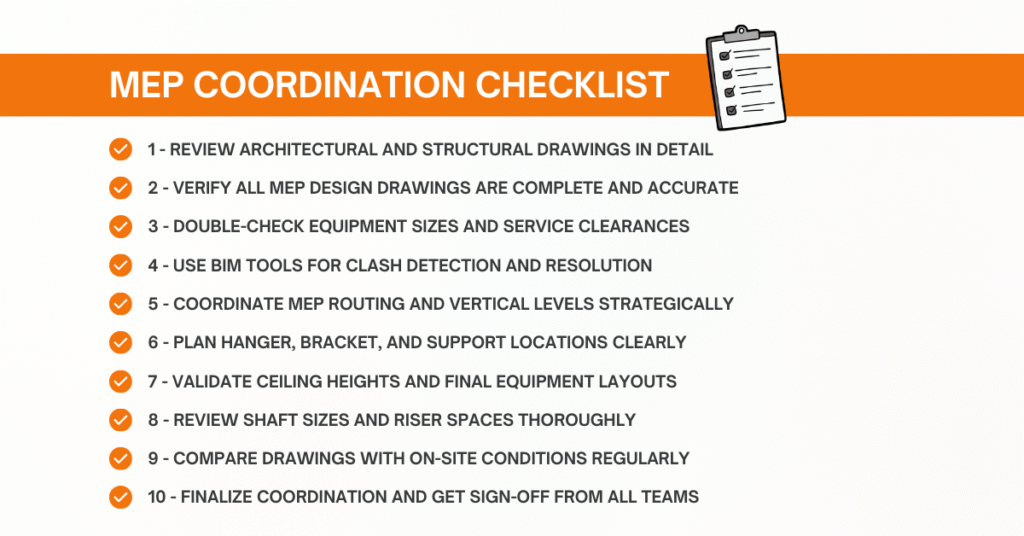
1. Review Architectural and Structural Drawings in Detail
Start with a full review of architectural and structural drawings. These documents show the building’s layout, including walls, floors, beams, and columns. Before placing MEP elements, you need a complete understanding of the physical space you’re working with.
Go through each floor plan carefully. Identify tight areas like corridors, bathrooms, and shafts. Note slab levels and ceiling heights. Check where beams intersect with potential MEP runs. Doing this early gives your team the context to plan intelligently and avoid surprises later.
Including this step in your MEP Coordination Checklist gives a solid foundation for every decision you make next.
2. Verify All MEP Design Drawings Are Complete and Accurate
Before diving into coordination, take time to review all MEP drawings. These include HVAC layouts, lighting plans, plumbing schematics, fire protection systems, and control wiring diagrams. Ensure each drawing has the correct scale, clear symbols, and detailed notes.
Often, coordination issues start with incomplete or outdated designs. For example, missing information about pipe sizes, air outlet placements, or electrical panel locations can cause delays on-site. Review each system’s design carefully and flag any missing or unclear information before moving forward.
A thorough check at this stage saves hours of rework and ensures your MEP Coordination Checklist covers everything needed.
3. Double-Check Equipment Sizes and Service Clearances
Equipment like chillers, AHUs, pumps, and panels often needs more space than their physical footprint. You also need room for maintenance access, ventilation, and future replacements.
For example, if you place a large AHU in a corner with no access on one side, technicians won’t be able to service it. That leads to tearing down walls or shifting other systems, which causes expensive, time-consuming delays.
Include specific checks in your MEP Coordination Checklist for:
- Manufacturer-recommended service space
- Future access paths for extensive replacements
- Ventilation and exhaust requirements
When you validate space requirements early, you avoid costly design changes later.
4. Use BIM Tools for Clash Detection and Resolution
Modern projects demand modern tools. Use Building Information Modeling (BIM) software like Autodesk Revit or Navisworks to simulate the 3D design of your project. These tools let you overlay MEP systems on architectural models to check for real-time clashes.
Run regular clash detection tests between:
- HVAC ducts and lighting fixtures
- Cable trays and structural beams
- Plumbing lines and fire sprinklers
- Electrical conduits and mechanical piping
Once you detect issues, resolve them quickly through coordinated meetings. Assign responsibility, agree on changes, and update the model. The earlier you resolve these conflicts, the fewer disruptions you’ll face on-site.
Include scheduled clash checks in your MEP Coordination Checklist—ideally, at the end of every design stage.
5. Coordinate MEP Routing and Vertical Levels Strategically
Routing is about more than drawing lines on a plan. Each MEP system needs a path through ceilings, floors, and walls. Ducts might interfere with pipes without proper level coordination, or cable trays might block access panels.
Establish a level hierarchy early on.
For Example:
- Top: HVAC ducts
- Middle: Plumbing pipes
- Bottom: Electrical conduits and cable trays
Follow this hierarchy in all spaces unless special conditions apply. Keep system routes logical, consistent, and easy to install. Adding clear level coordination to your MEP Coordination Checklist prevents tight squeezes and simplifies construction.
Also Read, MEP Modeling for Smart Buildings
6. Plan Hanger, Bracket, and Support Locations Clearly
Hangers and supports are easy to overlook during early planning, but critical during installation. Each pipe, duct, or tray needs physical support. Workers can’t install them properly if those supports clash with beams or other systems.
Use BIM to visualize supports and confirm they don’t interfere with structural components. Consider the weight of systems and ensure they’re anchored securely to concrete or steel, not lightweight partitions.
Your MEP Coordination Checklist should include:
- Hanger spacing and load ratings
- Location clearance from fire-rated walls
- Compatibility with acoustic or vibration control elements
Proper support planning leads to faster installations and fewer last-minute changes.
7. Validate Ceiling Heights and Final Equipment Layouts
Ceiling spaces are some of the most congested areas in buildings. HVAC ducts, light fixtures, fire sprinklers, and electrical systems compete for space. You need to plan these carefully to ensure everything fits.
Use section views to confirm ceiling heights at every location. Make sure the systems allow for ceiling finishes and lighting installations. If you find tight spots, adjust duct sizes, reroute systems, or change ceiling heights before work begins.
Add ceiling height verification as a must-have point in your MEP Coordination Checklist. This step prevents on-site conflicts that halt progress and cause delays.
8. Review Shaft Sizes and Riser Spaces Thoroughly
MEP shafts and risers are vertical routes that carry services between floors. These spaces must be large enough to hold multiple systems running side-by-side. Even a 100 mm error in shaft width can stop construction.
Coordinate early with all trades to finalize what goes inside each shaft. Allocate zones inside shafts for different systems and reserve extra space for fire-stopping materials or insulation.
Include this coordination in your MEP Coordination Checklist with checks for:
- Shaft clearances
- Number of services passing through
- Future expansion or maintenance needs
Shaft issues are the hardest to fix once construction starts – avoid them by planning.
9. Compare Drawings with On-Site Conditions Regularly
Even the best design can fail if it doesn’t match real-world conditions. During early civil works, site changes can affect beam positions, wall thicknesses, or slab heights.
Before any MEP work begins, do a physical walkthrough and compare site conditions with your coordinated drawings.
Look for:
- Misaligned beams
- Unexpected penetrations or openings
- Equipment placement challenges due to fundamental layout changes
Update your models if you find changes, and get approval from stakeholders before proceeding. Add a regular site inspection step to your MEP Coordination Checklist to catch these problems early.
10. Finalize Coordination and Get Sign-Off from All Teams
Once you’ve resolved all clashes, reviewed site conditions, and finalized designs, get sign-off from all teams involved.
This includes:
- Architects
- Civil and structural engineers
- MEP subcontractors
- Site supervisors and project managers]
Please ensure everyone works from the exact drawings and understands their roles. This final step ensures that execution on-site is smooth and without surprises.
Add a formal approval checkpoint to your MEP Coordination Checklist so that no one starts work with outdated or unapproved designs.
Other Helpful Terms Related to MEP Coordination
Besides “MEP Coordination Checklist,” you’ll also find these terms useful:
- MEP coordination plan
- Construction coordination checklist
- BIM coordination checklist
- MEP clash detection
Using these checklists and tools together creates a clear path to building faster, smarter, and without delays.
Final Thoughts: Stop Site Delays Before They Start
A successful construction project isn’t just about good design or quality materials, but thoughtful planning and teamwork. Using a clear MEP Coordination Checklist gives your team a roadmap to follow. It helps you catch errors early, keep everyone aligned, and deliver your project on time.
To recap, a strong checklist will help you:
- Understand architectural constraints
- Ensure design completeness
- Plan routes and levels
- Detect and resolve clashes
- Keep construction flowing smoothly
Start using this checklist on your next project and experience fewer delays, better teamwork, and more confidence every step of the way.